We can’t send you updates from Justia Onward without your email.
Unsubscribe at any time.
In this digital age, images get stolen all the time online. Most people will assume that if an image is posted publicly on the Internet then it should be fine to use it, which it is not the case in many instances. Therefore, there are some things you should know about protecting your images before uploading them to your website. Custom images on your website are a key visual element of your website design and your law firm’s overall brand message. This article presents several measures you can implement to protect your custom images and the hard work behind them.
If you are wondering why you should protect your images, let’s start with a shocking fact. According to some studies, 85% of all images uploaded to the Internet get stolen or are used without proper permission. Whenever you post an image online, there is the chance that your image may end up in someone else’s website without your permission or proper credit to the original source, i.e., your website. We know that images can make a website look more appealing and attractive by improving the perception and user experience that a visitor could have. Also, images can help us drive more visitors to our website in several ways that we will describe below.
Therefore, people tend to make an effort to include high-quality custom images on their web properties, either by licensing stock images or by hiring the services of a professional photographer. Even in some cases (for example, photos), those images are the result of being in the right place at the right time, so they are unique. Those custom images can represent a cost in terms of both money and time (sometimes not a cheap one!). So, it can be quite frustrating when we do not receive credit for images that we have created or edited specifically for exclusive use on our website, and they appear on other websites or online platforms, such as social networks or photo sites, without proper attribution. In many cases, you own the copyright to a photo as soon as you have taken it. However, that does not prevent other people from trying to copy or make use of our photos without our consent.
Besides the obvious reasons why images are important, such as being a key component of any effective website design and the fact that people love images, there is one more important reason that we cannot forget. Images can help you boost your website visibility. How? Search engines usually index images in a website, and people share images on their social networks. After all, a lot of social engagement is driven by visual content mainly. If people find your image original and engaging, they will feel more compelled to share it with others. This can allow our law firm’s website to be discovered on other channels or platforms (for example, when a person performs an image search on Google, and our image appears in the results). Thus, it is very important that the original images shown on the search results or the social network feeds, and that belong to you, can be traced back to your website somehow.
By the way, did you know that Google Image Search is the second largest search engine in the world? It may not get the same attention as other Google properties, such as YouTube, but millions of searchers use Google Images on a daily basis. That’s why Google is constantly improving and introducing new features to this search service. If you are not optimizing your images for Google Images, you are missing out on an opportunity to build and promote your brand online through your website images. We will cover the topic of how to optimize your images for Google Image Search in another post soon.
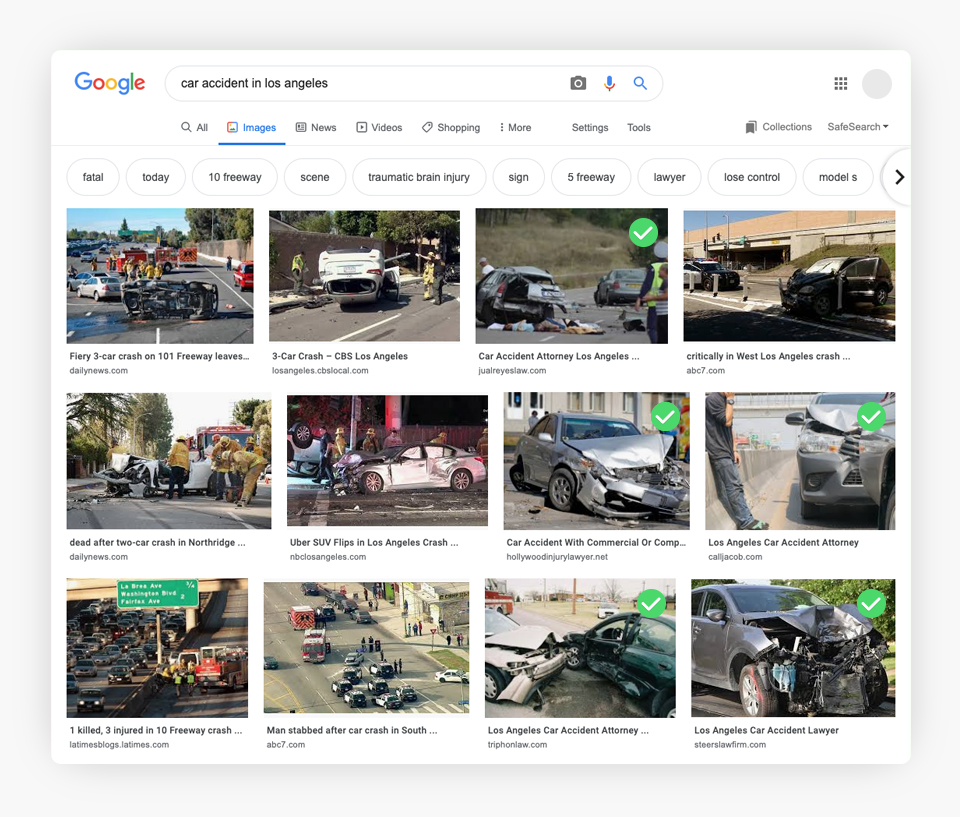
In this example, you can find at least 5 images from law firm websites in Google Images’ search results for “Car accident in Los Angeles”. So when someone clicks on their image, they will be taken to their website.
What can we do to prevent third parties from copying or using our images without giving us the corresponding credit? Below we will discuss seven ways to protect our images. These measures could also help prove you are the owner of the images’ rights, attributing corresponding credit, in case of a dispute. We will first mention ways that are easy to implement because they do not require technical web development knowledge:
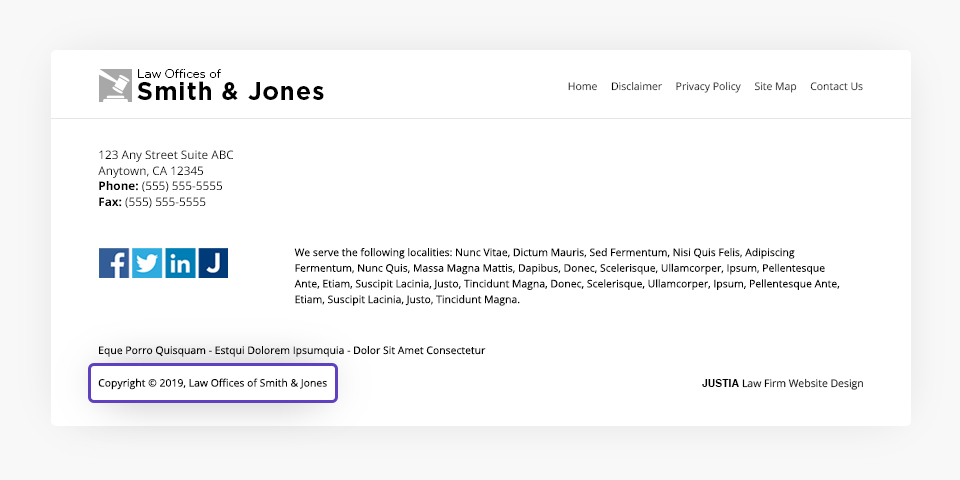
1. Add a copyright notice. Add a valid copyright notice on the page where the images are displayed; the most common location is on the footer or below a specific image for which you want to protect the copyright. By doing this, you are informing visitors that the images are protected. In many cases, this measure is sufficient to discourage people from copying or making use of the images without your prior authorization. The format for a copyright notice generally includes four components: the word “copyright,” the copyright symbol (©), the year, and the author’s name. In some more specific cases, a statement of rights (e.g., “All Rights Reserved”) may be included.
2. Watermark your images. This measure consists of adding a semi-transparent text or design element associated with your law firm brand on the image. Some of the most common brand components that are added are the business name, the logo, or the website address. This method is highly recommended when you are planning or anticipating that the image will be shared on social networks.

3. Add metadata. This is one of the most popular methods that professional photographers use to protect their images. It consists of editing the photo’s metadata. In other words, it involves editing the photo’s hidden information that contains relevant details, such as author/creator, date and time of the original shot, format, and even the location where it was taken. It is recommended that you fill in the corresponding fields with descriptive information. Also, we highly recommend using a filename that describes the content of the image, in a unique way if possible. To view this information, you can simply right-click on an image file in your file explorer and select View or Get Info, or view the image properties with some image editing software.

Tip: If you are a photography enthusiast, and you frequently use photos that you have taken yourself on your website or blog, we recommend that you configure your camera or smartphone settings to automatically add metadata to the image. For example, you might add your name, a timestamp of when the picture was taken, the location (if your device has GPS built in), and a caption. This tip will save you a lot of time by adding this layer of descriptive information automatically every time you shoot a photo.
You will need a photo editing software or an app to add a watermark or edit your image’s metadata. These are some of the most popular free options available:
- GIMP. This editor has advanced editing options. Available for Windows, macOS, and Linux.
- Canva. Canva runs in the web browser, which makes it accessible from different devices.
- Microsoft Paint. If you have a Windows PC, it is quite likely that this option is available for your use.
- For Mac users, there are two alternatives: Preview for fast and simple tweaks, and Photos for more elaborate editing.
- There may be other options available in the form of apps for your smartphone, such as Adobe Photoshop Express.
It is worth mentioning that it is not necessarily a negative thing when people share our images, such as on social networks. This allows our images to reach more people. In those cases, it is important that we apply some of the methods mentioned above so that our legal firm’s brand is always associated with our images. For other instances, especially when it comes to original images or personal photography intended only for visitors to your website, you may want to prevent sharing completely that they can be copied or indexed. For those cases, you can implement any of the following techniques, which require some technical knowledge about web development or collaboration with your webmaster or website provider.
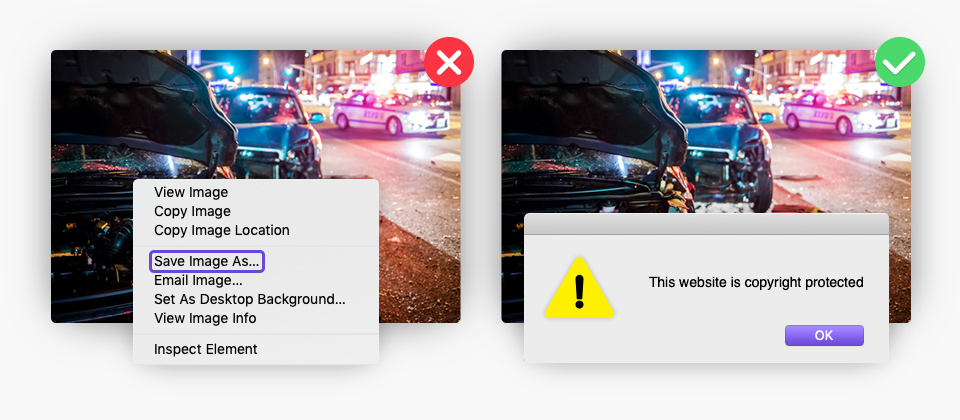
4. Disable right-click. A common way to download an image from a website is by right-clicking on it and selecting the Save Image As option. If you want to protect the image from being copied in this way, you can disable the right-click function on your web page with a few lines of JavaScript code. If your website uses WordPress as a CMS, there are different plug-ins for this purpose that do not require any coding. This technique may be a bit annoying for some users, but it serves its purpose.
5. Disable hot-linking. Before describing this method, it is important to first explain what image hot-linking is. Image hot-linking is when people embed your image on their website by linking directly from your site instead of hosting the image file directly on their servers. This can be considered a bad practice if whoever is hot-linking does not add any credit on their site regarding the image’s source. Furthermore, this can affect your website’s performance because the picture will load from your server every time someone opens the external site’s page that has your image. To prevent other websites from linking to pictures from your site, you have to add some rules in the configuration files of your web server. Those rules would only allow the websites that you choose to have access to your images. For example, if your website works with Apache as a web server, you would need to add the rules in the .htaccess file.
RewriteEngine on

RewriteCond %{HTTP_REFERER} !^$

RewriteCond %{HTTP_REFERER} !^http://(www\.)yourdomain.com/.*$ [NC]
RewriteRule \.(jpg|jpeg|png|gif)$ - [F]
These four rules will block hot-linking of your images from other sites to your server. The server will return a 403 Forbidden status instead.
6. Prevent indexing with robots.txt. For images that are intended for your website visitors only, and that you do not want to be indexed by search engines or other systems that use “crawlers” to copy a site’s content (including images), you can restrict access to them by updating the robots.txt file. In simple words, the robots.txt file is a text file that dictates a series of indexing instructions for crawlers (for example, which files or folders they can access). You can visit this Google page to learn more about the robots.txt file. It is easy to check out your website’s robots.txt file. Just add “/robots.txt” to the end of your domain (for example, www.yourdomain.com/robots.txt). By making small changes to this file, you can prevent images on your website from appearing in Google’s search result pages. See example below:
User-Agent:*

Disallow:/images/
These two lines of code will block all search engine bots from accessing the directory that contains all images for a website.
7. Use coding tricks. Finally, we will mention two techniques that use a bit of HTML and CSS code to prevent our images from being downloaded by software or a program and subsequently used directly on another site automatically. Also, it will mean extra steps for a person who wants to copy the image manually. If we cannot prevent image theft completely, at least we want to make illegal copying harder.
- The first trick is to include the image as a CSS background image and apply a transparent overlay. If someone tries to copy the image by using the right-click function, they would only be saving the transparent graphic in the foreground.
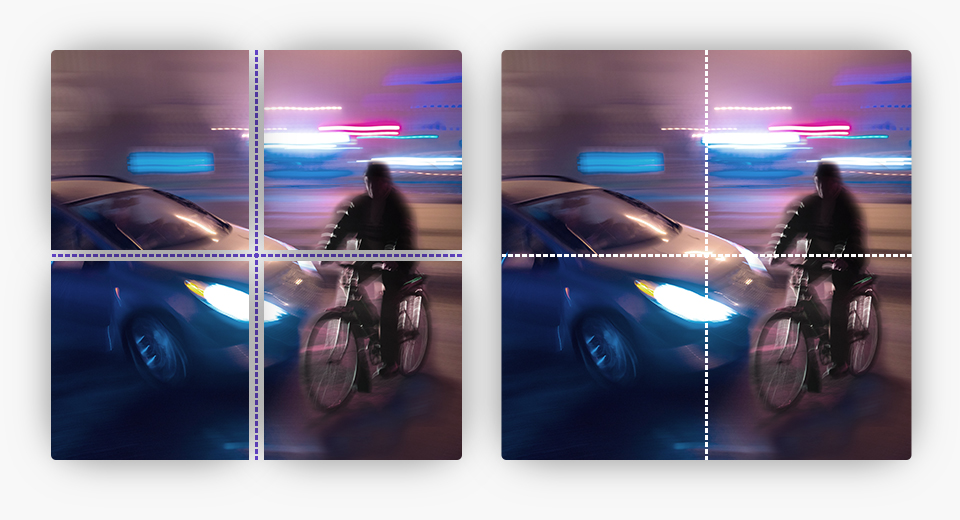
- The second trick is to break your image into smaller image tiles and then piece them together by using HTML tables or divisions (<div>). As you can guess, this technique is known as “image tiling.” Thus, when a person wants to copy the image, they would only be copying a small part of it.
How to Find Your Website Images on the Internet
If you suspect that your images have been used without your permission, or you simply want to know which sites are sharing your images, the most effective way is performing a reverse image search by using Google Images. Follow these three simple steps to use Google’s reverse image search:
1. Go to https://images.google.com/
2. Click on the small camera icon in the search bar.
3. You can paste the image URL or upload an image.
The results may include similar images and the websites that contain these images. Another way to find your images online is to enter the filename in the search bar if the uploaded image file has a unique filename or, at least, is easily recognizable. The results will include images with the same or similar filenames.
Copyright Infringement
It is worth mentioning that we must also ensure that we do not infringe the copyright of third-party images that we may have on our website or blog. If someone finds out that you are using their copyrighted images on your website without proper authorization, you may receive a DMCA notice to take down the images from your website as soon as possible, or in a worst case scenario, you may even get sued for stealing the images. If you receive a Digital Millennium Copyright Act (DMCA) notice, it is important that you comply with it immediately.
We recommend reading this blog post to learn about some ways to avoid copyright infringement. A courtesy if we are going to use a royalty-free image or have the authorization to use it from the author/creator of the original image is to give credit for the image posted on our website (for example, by adding a line of text such as “Photo/Image courtesy of ” or “Photography by”). Providing a credit shows that you acknowledge other people’s creative efforts too.
Summary
Images are essential resources on a website because they help to visually communicate the message that you want to convey to your target audience. And, as the saying goes, a picture can be worth a thousand words in certain cases. However, we must face the fact that any image posted on the Internet, whether on a website, blog, or any other online platform (e.g., social networks), is likely to be copied. Instead of getting frustrated, we can see it in a positive light and make it work in our favor. We can do so by implementing one or more of the methods we outlined above. Thus, we can ensure that the original author or source of the image is given credit (in other words, the law firm’s website). This will help us improve our online visibility and drive more traffic to our website. If we do have to protect an image from being copied, we can resort to some of the most advanced techniques described in the last points of the list. Ultimately, there is always the option of registering your copyright with the U.S. Copyright Office if your image’s use is strictly prohibited without prior authorization.