We can’t send you updates from Justia Onward without your email.
Unsubscribe at any time.
Interested in using pay-per-click (PPC) ads to create a more well-rounded marketing strategy for your law firm, but don’t know how? Let this quick start guide help you navigate the initial set up process.
When you are new to digital marketing, each step in the process can seem overwhelming but we don’t want it to be that way. At Justia, we are committed to equipping legal professionals like you with the knowledge and resources to effectively develop and execute your legal marketing plans.
If you are a regular reader of this blog, you may know that pay-per-click (PPC) ads are an important part of an integrated, effective digital marketing strategy. In recent months, we have shared information on combining SEO and PPC to create a more well-rounded marketing plan, as well as leveraging both Google Ads and Google Local Services Ads to reach your goals. However, if you are new to PPC, setting up Google Ads may seem like a mystifying process.
Do not be dismayed! This post will help shed some light on getting started with Google Ads. Keep reading for a brief introduction to PPC and the technical process of setting up an ad for Google Search results.
Please note, if you have already set up a Google Ads campaign and are looking for best practices and tips on managing your campaign, this may not be the post for you. However, we encourage you to request updates for Justia Onward posts, so that you don’t miss any best practices information we share in the future.
PPC & SEM Advertising in a Nutshell

The most common type of Google Ads is generally pay-per-click (PPC) ads. Therefore, before you consider setting up a Google Ad, you need to know some of the basics of PPC advertising. In the most basic sense, PPC ads are exactly what they sound like: you only pay when someone clicks on your ad and you will pay for each click.
There are multiple platforms where a PPC ad may show. If you want your ad to appear in the search engine results pages (SERP) of Google (or another search platform) then you are engaging in search engine marketing (SEM). With SEM, there is essentially an auction where you will bid on certain keywords in an effort to get your ad to appear at the top of the SERP, while Google also dynamically evaluates several other related factors in addition to your bid.
Nonetheless, your goal is to have your ad appear above other ads and organic search results. Your ad may appear in other places on the SERP, or may not show up at all, depending on the results of the auction and related analysis.
The keywords you bid on are what help match you to the search queries or requests that users type into the search bar. However, there is more that goes into your ad ranking and the results of the auction than purely the keyword bid. Instead, Google uses additional factors that influence user experience to determine who wins its auction and calculate ad rank, such as expected clickthrough rate, the relevance of your ad, and the landing page experience.
If you are new to all of this, the nuances of SEM and PPC will often take some time to learn. If you need more information to help you understand the process before getting started, we recommend checking out this recent article from Search Engine Journal and Search Engine Land’s Complete Guide to PPC (Pay-Per-Click) Advertising
Watch this Justia Webinar playlist on YouTube.
Setting Up Your Google Ads Account
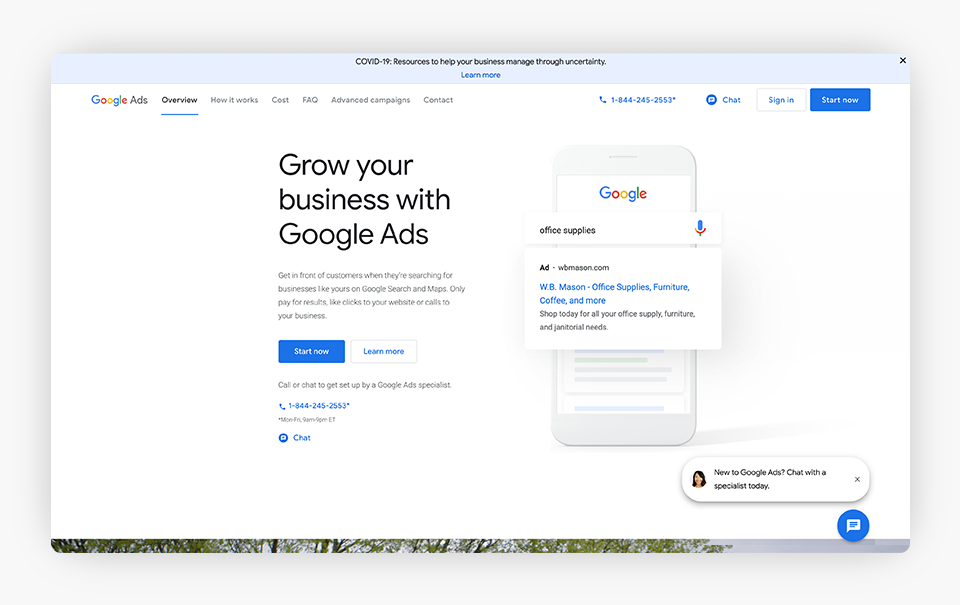
To get started with Google Ads, you will need a Google Account. If you don’t already have one, you can head here to get started on creating your account. Once you have created your account, you will need to do some basic account setup.
When you sign in for the first time, the system will default to Smart Mode. Smart Mode is intended as a simplified experience where you choose your goals and budget and Google will use automated data or “machine learning” to help you reach that goal. The Smart Campaigns have simplified features, such as assisted ad setup, keyword optimization, streamlined performance reports.
Expert Mode offers additional features and campaign types. It is designed to give you as the advertiser more control over the bidding strategy you will utilize. In general, Expert Mode requires you to be more hands-on with your marketing. It allows you to create all types of campaigns and gives you more control over bidding and keywords as well as access to detailed performance reports.
If your firm has a dedicated marketing team, you absolutely should switch your account to Expert Mode. If you do not have a dedicated marketing team, the answer is less straightforward. However, we still suggest switching your account to Expert Mode to have access to all that Google Ads can offer you, but please note that once you switch to Expert Mode you cannot return to Smart Mode.
When you log in to your Google Ads account for the first time, the system will ask “What’s your main advertising goal?” The options available will be:
- Get more calls,
- Get more website sales, or
- Get more visits to your physical location.
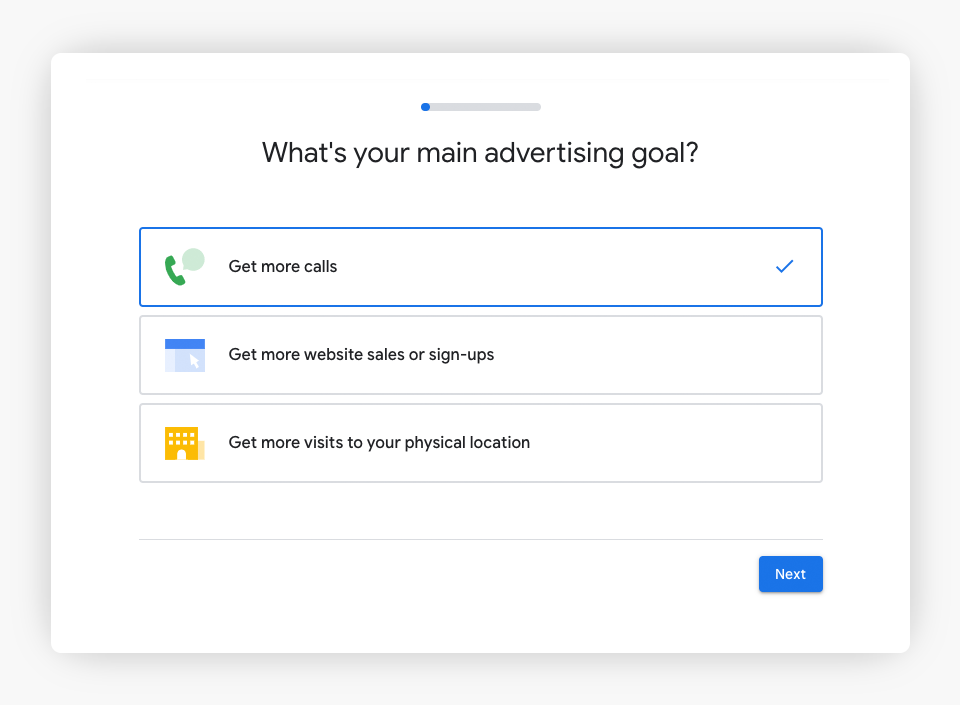
If you select any of these options, you will continue in Smart Mode. However, at the bottom of the screen, there will also be a prompt that says “Are you a professional marketer? Switch to Expert Mode.” Selecting this will get you started on the path to Expert Mode.

Note: If you have used Google Ads before, you will not get this prompt at login. If your account is in Smart Mode, you can switch to Expert Mode from the “Tools” icon at the top right corner.
At your first login, you will also be prompted to create a campaign and select a specific campaign type. You can skip this step until you are more familiar with the system. Also, you will be prompted to confirm your business information.
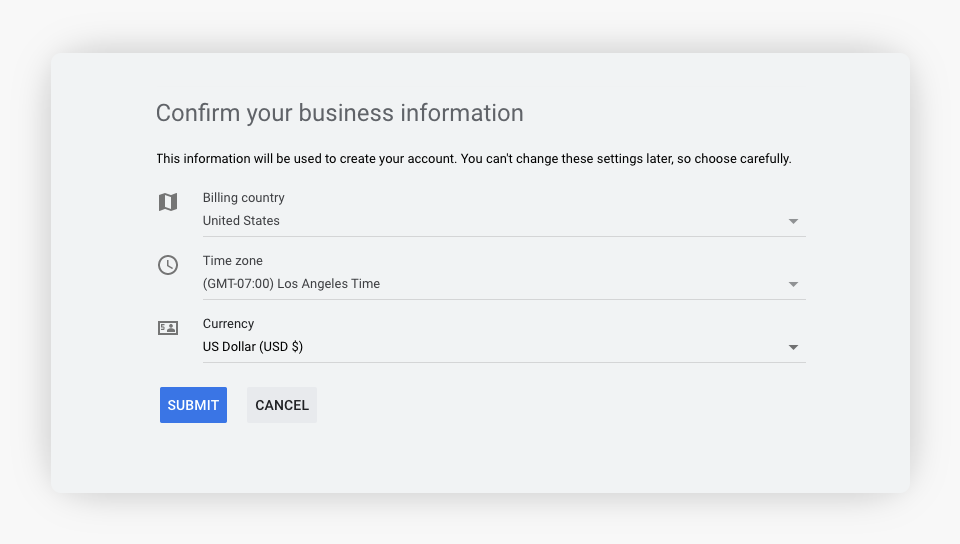
It is important to make sure your firm information is correct on this screen!
Setting Up Your First Campaign in Expert Mode
1. Select “Campaigns” then the plus symbol to start a new campaign and select a goal.
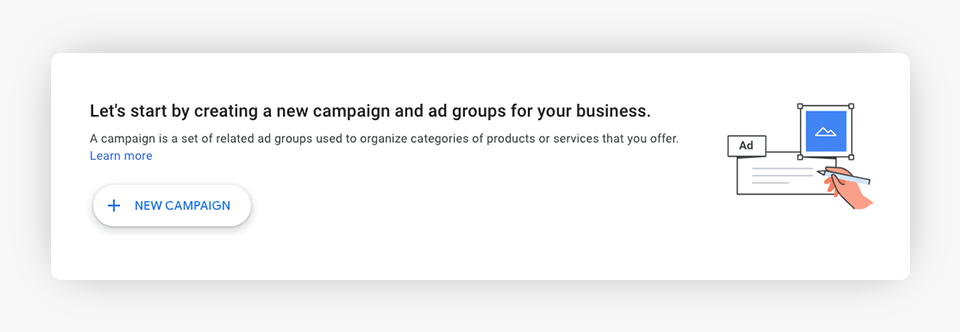
For a law firm, the goal is often generating leads or website traffic. However, you can choose another goal if that is a better fit for your marketing goals. You can also choose to continue without selecting a goal to guide your campaign. We suggest choosing this latter option if you want complete control over the process.
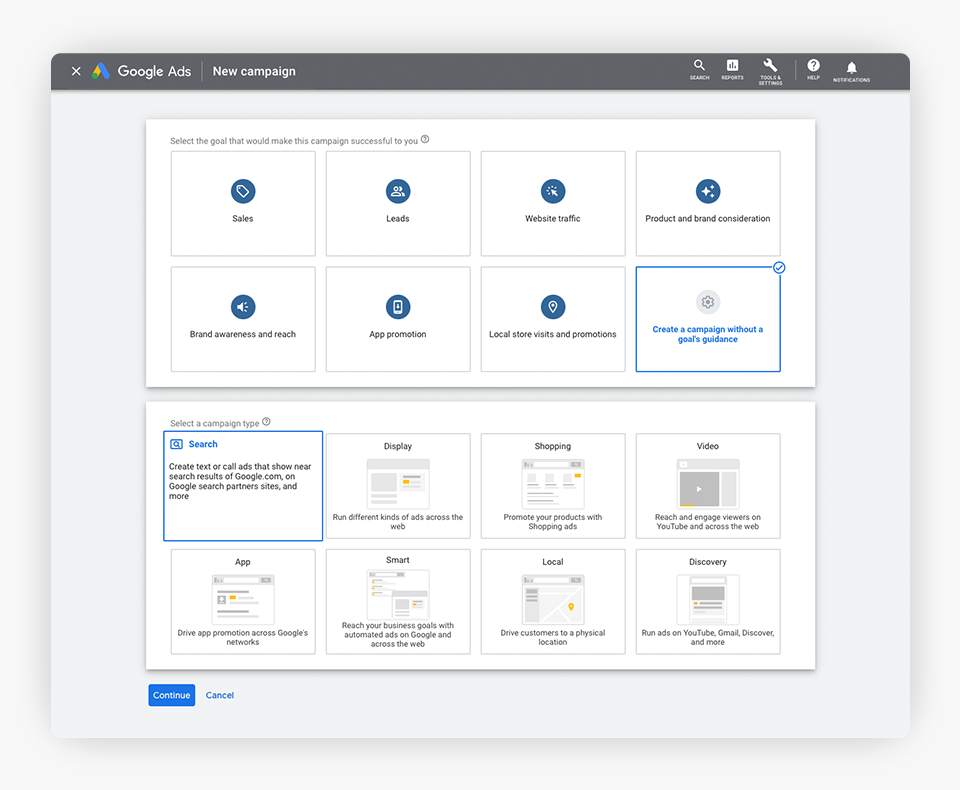
2. You will need to select a campaign type. While you will be presented with several options, make sure you choose “Search” for your campaign type. This is how you can reach your potential clients with text ads on the SERP.
3. Google will ask you more about how you would like to reach your goals, such as through website visits, office visits, phone calls, or some combination of these. Again, you can choose not to select anything in this field either.
4. Name your campaign. Pick something that makes sense to you and your marketing. You get to decide.
5. Choose your campaign network i.e. how you want to reach your audience. The system should ask if you want your ad to be shown through Search and/or the Display.
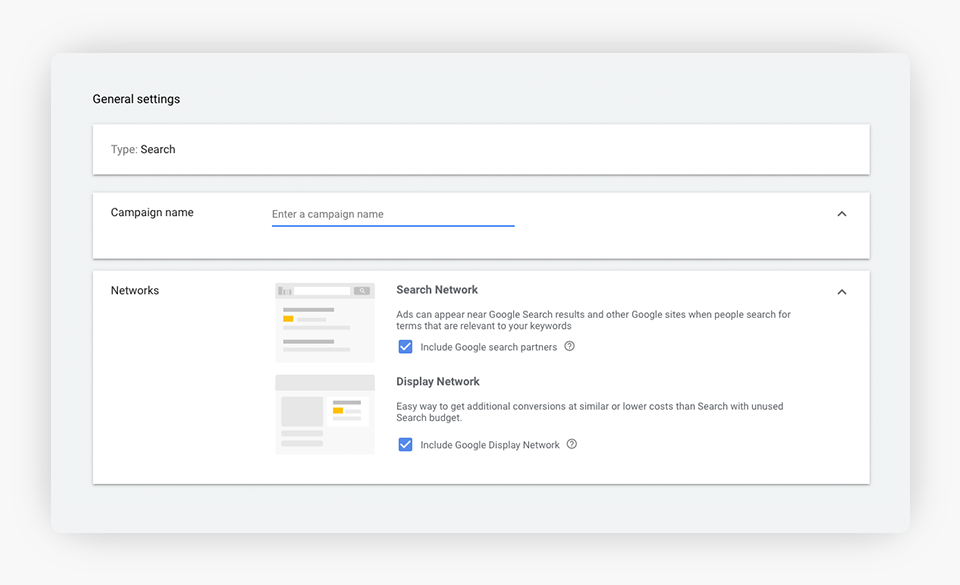
You want to choose Search to show your ads through the SERP. We recommend that you opt out of the Display, especially for your initial campaigns.
6. Select your target locations. This is where you can set your locations for your ad, such as certain states and cities. You could also choose to target within a specific radius of your office or zip code or exclude certain locations. If you would like, you can even set your location as all countries, but we don’t recommend this. That would simply be a waste. You need to target your ad to the locations where you practice.
Once you have selected your locations, you can click on “Location Options” to choose the people you want to target:
- People in or who show interest in your target area,
- People in or regularly in your target area, or
- People searching for your target area.
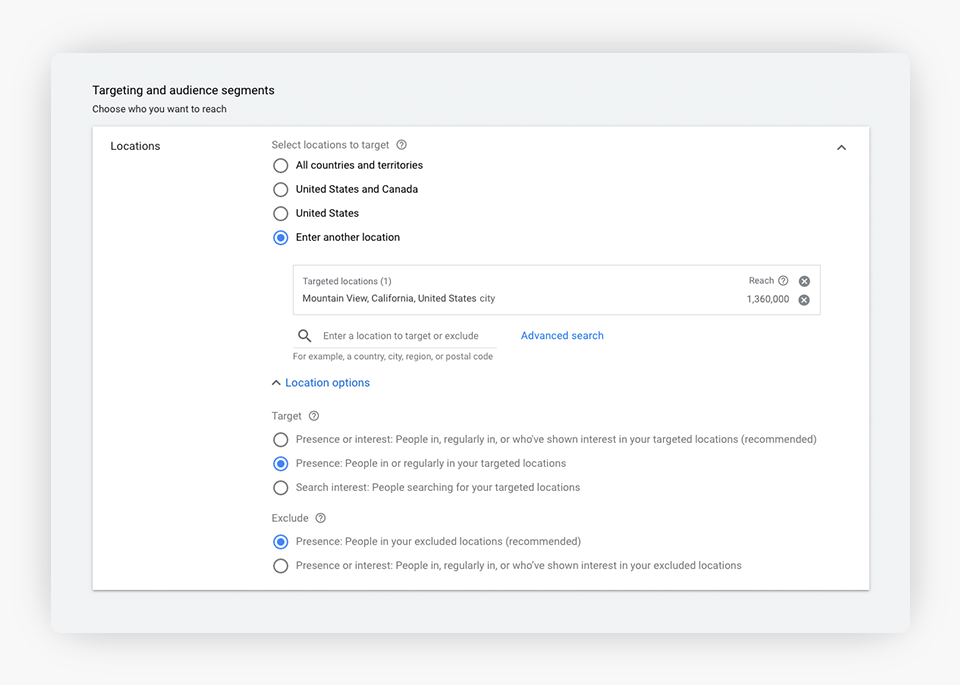
If you believe you will have searchers from outside of your physical location that are within your target audience, then choose the first choice. If your potential clients are generally local or you do not wish to target people outside of your area, then selecting the second choice is your best bet for limiting your ads to people who are physically present in your selected locations.
7. Set your budget. This is where you tell Google how much money you are willing to spend on this campaign each day. If you have a monthly number, then divide that number by the number of days you will run ads. The Google Keyword Planner can help you figure out what a realistic budget may be by helping you evaluate the cost to bid on certain keywords.
8. Choose how you will bid. The system offers you automated bidding strategies based on the types of results you may want (conversions, conversion value, and clicks and impressions) or you can select a bid strategy directly. Again, if you want full control over this process, you can choose the “select a bid strategy directly” option.
When you click “select a bid strategy directly” you will be shown even more automated bidding options. However, beneath all of those options, you will see Manual CPC.
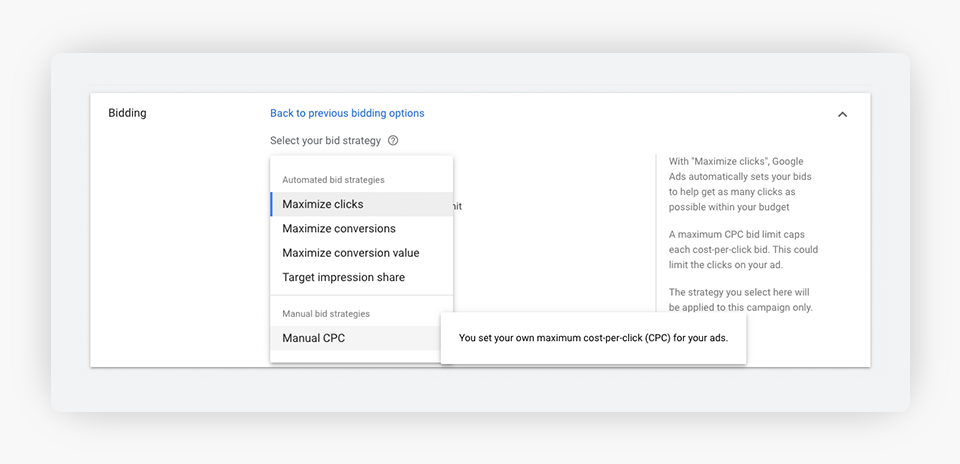
Then, you can select your settings.
9. Select your ad schedule. This is where you choose the days and times you want your ads to be eligible to be shown on the SERP.
10. Set up your ad extensions. Here you have three primary extension types: Sitelink Extensions, Callout Extensions, and Call Extensions. Sitelink Extensions allow you to show additional links with your ads that can send potential clients to different pages on your website. Callout Extensions let you highlight things like special promotions or types of services and cases handled. Call Extensions allow you to show your phone number with your ad. We recommend that you at least enable the Call Extension.
11. Set up your Ad Group and Keywords. Ad groups are essentially a cluster of related keywords to be shared by one or more of your ads. Choose keywords that you think people will use to find you. For example, are you a divorce attorney? Do you handle car accidents? What about criminal law or immigration issues?
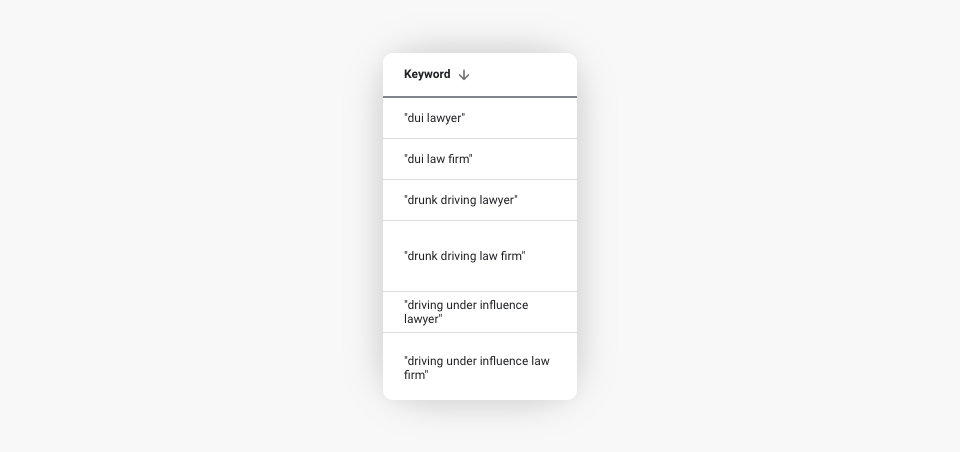
You should choose keywords that reflect your core practice and service areas. The Google Keyword Planner comes in handy here to help you evaluate sample keywords that may work well for your campaigns. If you need more information on match types for keywords and phrases, you can look at this resource from Google.
12. Create your ads. After you have set up your Ad Group and Keywords, the next step is to actually write your ad that will display on the SERP. The final URL is the webpage that your ad links to. Ideally, this page will closely match the service promoted in your ad.
For example, if your ad is for DUI defense, then this landing page needs to share information about your DUI representation. You may want to consider creating customized landing pages for these ads if you do not already have a corresponding page on your website with an easy way to contact you. You can also include up to 3 headlines with your ad that will tell the searcher what your ad is about and should prompt them to take action. The display path is the part of the URL that will show with your ad and should give the searcher an idea of where the ad will take them. Finally, you will need to complete your descriptions. This is the part of your ad that should be more detailed and explain your practice and the service you are offering.
Setting Up Your First Campaign in Smart Mode
In a smart campaign, Google’s algorithm takes care of much of the decision-making process, allowing you to take a much more hands-off approach to your advertising campaign. If you choose to leave your account in Smart Mode, all of your campaigns will be smart campaigns. How do you approach a smart campaign?
1. Determine what your budget for the campaign will be. You will need to tell Google how much money you are willing to spend on your ad campaign each day. If you have a monthly number, divide that number by the number of days in the month.
2. Write an ad for your campaign. You will be able to edit this throughout the process.
3. Choose your keywords. The Google Keyword Planner can help you evaluate sample keywords that may work well for your campaigns.
4. Answer the prompts presented by the Google Ads system. This process will be self-explanatory, and you will have your ad set up and ready to go before you know it.
Final Thoughts: Why Do You Care?
Because Google is indisputably the top search engine in the world, Google Ads is often the cornerstone of a new PPC campaign. This guide should help you understand the technical aspects of starting your own Google Ads campaign.
However, if you need more assistance, you can always consider hiring a third party to help you navigate the process. Our own Justia Amplify PPC Management service is designed to help lawyers just like you with your Google Ads campaigns, as well as various other digital marketing tactics.
Related Posts